
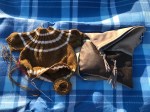
Handmade Crochet Coin Purse – “Little Heart, Big Story” ❤️

Handmade Crochet Coin Purse – “Little Heart, Big Story” ❤️
✨ Every stitch tells a story.
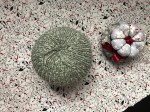
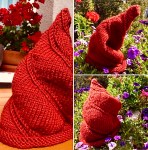
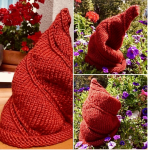
This fiery red crochet purse was lovingly handmade, loop by loop, with the intention of holding more than just coins. It’s here to protect your tiniest treasures — a lucky charm, a folded love note, a keepsake from someone dear — and keep them close to your heart.
Its soft, textured yarn gives it warmth and personality, while the silver kiss-lock clasp adds a timeless, vintage touch. Compact yet roomy, it slips easily into your handbag or pocket, making it the perfect companion for everyday adventures.
Features:
🧵 100% handmade crochet work ❤️ Vibrant red for a bold, timeless look 🔒 Secure silver kiss-lock clasp 📏 Compact size: perfect for coins, jewelry, and keepsakes 🎁 Comes beautifully packaged – perfect for gifting
Why You’ll Love It:
This is not just an accessory — it’s a piece of handmade art that carries the warmth, patience, and joy of the person who made it. Unlike mass-produced purses, each one is unique and tells its own story.
💰 Price: 55 €
(Special launch offer: 49 € – for the first 5 customers only!)
📦 Ready to ship – packaged with love and care.


Crochet Baby Garments for Hot Weather

Adorable Baby Rompers
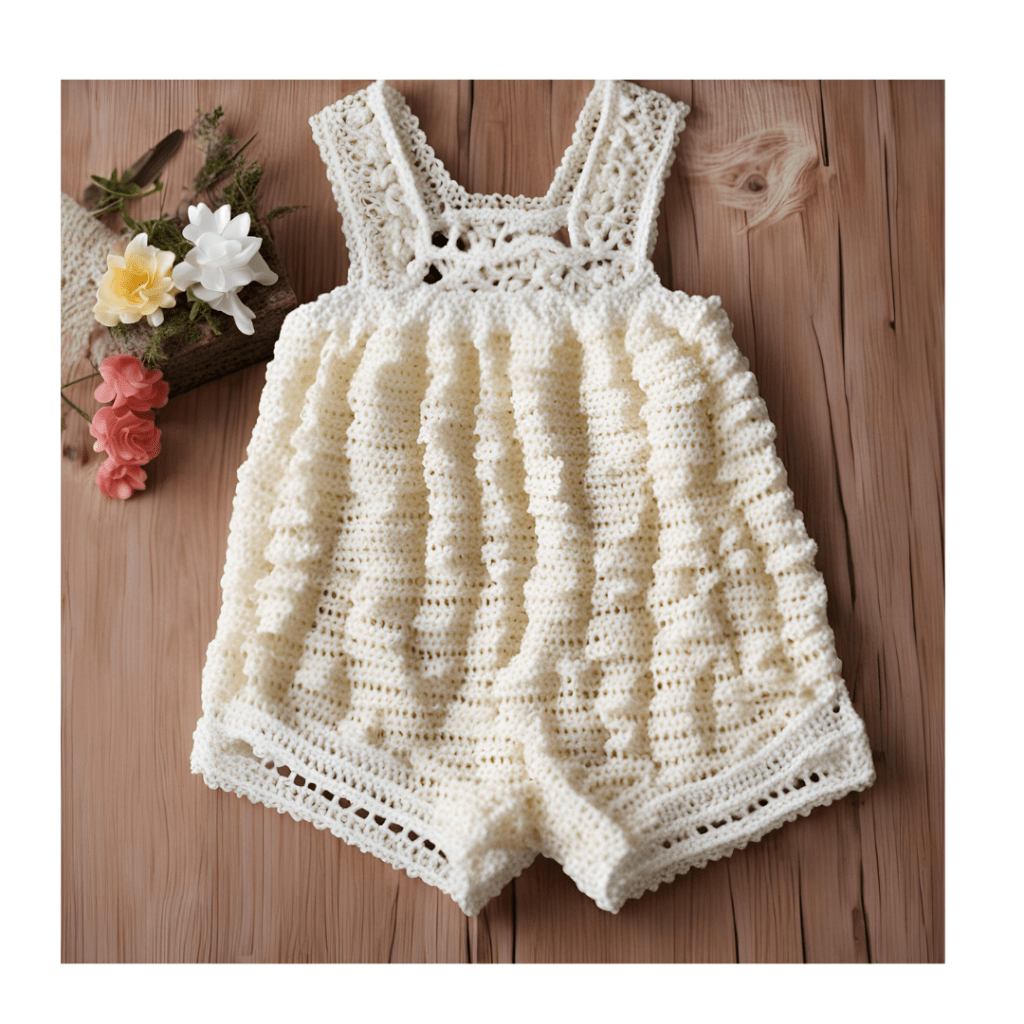
In the world of crochet, there is something undeniably charming about creating adorable baby rompers. These tiny garments are not only fun to make, but they also make for a perfect gift for new parents or a precious addition to any baby’s wardrobe. In this subchapter, we will explore the world of baby rompers and learn how to create them quickly and easily.
For beginners in crochet, baby rompers are a great project to start with. They typically require simple stitches and basic techniques, making them an ideal way to practice your skills. With clear instructions and step-by-step tutorials, you will be able to create your own beautiful baby rompers in no time.
For advanced crocheters, baby rompers offer a chance to showcase your skills and creativity. You can experiment with different yarns, colors, and stitch patterns to create unique and stunning designs. Whether you prefer a classic style or a more modern look, there are endless possibilities when it comes to creating baby rompers.
For DIY lovers, making baby rompers allows you to customize the garment to your liking. You can add embellishments, such as buttons, bows, or appliques, to make each romper truly one-of-a-kind. With a little creativity and imagination, you can turn a simple crochet project into a work of art.
For vintage garments lovers, baby rompers offer a nostalgic and timeless appeal. You can recreate classic designs from the past or put a modern twist on vintage styles. Whichever route you choose to take, creating baby rompers is a rewarding and enjoyable experience that will bring joy to both the maker and the recipient.
Cute Sun Hats for Babies

In the world of crochet, there are few things cuter than a baby in a sun hat. These adorable accessories not only protect delicate skin from the harsh rays of the sun, but they also add a touch of style to any little one’s outfit. In this subchapter, we will explore some of the best patterns and techniques for creating cute sun hats for babies that are both fast and easy to crochet.
For beginners in crochet, creating a sun hat for a baby may seem like a daunting task. However, with the right pattern and a bit of practice, you’ll be surprised at how quickly you can whip up a beautiful and functional accessory for your little one. Many patterns for baby sun hats are designed with beginners in mind, featuring simple stitches and clear instructions that make the process a breeze.
For advanced crocheters looking to expand their skills, creating a sun hat for a baby can be a fun and rewarding challenge. With intricate lace patterns, unique stitch combinations, and creative embellishments, the possibilities are endless when it comes to designing a one-of-a-kind sun hat for a special little one. Advanced crocheters may also enjoy experimenting with different yarn weights and textures to create a truly unique and personalized accessory.
For DIY lovers who enjoy creating handmade gifts for loved ones, a crocheted sun hat for a baby is the perfect project. Whether you’re expecting a new addition to the family or attending a baby shower, a handmade sun hat is a thoughtful and practical gift that is sure to be cherished for years to come. By choosing a pattern that matches the recipient’s style and personality, you can create a truly special and meaningful gift that will be treasured for generations.
For vintage garment lovers who appreciate the timeless charm of classic styles, crocheting a sun hat for a baby is a wonderful way to capture the nostalgia of days gone by. Vintage-inspired patterns often feature delicate lacework, sweet embellishments, and timeless silhouettes that evoke a sense of nostalgia and romance. By choosing a vintage-inspired pattern for a baby sun hat, you can create a charming accessory that is both stylish and timeless.
Easy-to-Crochet Baby Sandals
In this subchapter, we will explore the art of crocheting easy-to-make baby sandals, perfect for the little ones in your life. Whether you are a beginner in crochetting or an advanced crochetter looking for a quick and satisfying project, these adorable sandals are sure to delight.
To get started, you will need some basic supplies such as yarn in your desired color, a crochet hook, and a pair of scissors. You can choose a soft and breathable cotton yarn for a comfortable fit for baby’s delicate feet. The pattern for these sandals is simple and straightforward, making it a great project for those looking to practice their crochet skills.
One of the best things about crocheting baby sandals is that they work up quickly, allowing you to create a cute and practical accessory in no time. These sandals can be customized with different colors and embellishments to suit your personal style. They also make a thoughtful handmade gift for baby showers or birthdays.
Crocheting baby sandals is a fun and rewarding way to showcase your creativity and craftsmanship. The repetitive nature of crochet stitches can be soothing and meditative, making it a great hobby for adults in need of relaxation and stress relief. Plus, seeing the finished product come together before your eyes is incredibly satisfying.
Whether you are a DIY lover, vintage garments enthusiast, or simply enjoy working on fast and easy crochet projects, these baby sandals are a must-try. They are versatile enough to be worn with any outfit, making them a practical addition to any baby’s wardrobe. So grab your crochet hook and yarn, and let’s get started on creating these adorable baby sandals!
My knitting Notebook – is now available in my Amazon shop 🍀🥳🤩
Hello there,
My name is Doinita, I am a knitter and I used to be so very disorganized with my projects. Until I have created my own Project Notebook and I now I can have it everywhere with me. Wherever I knit or an idea pops-up, I write it down in this Notebook.
It also helps you, to keep track of your knittings / row or whatever complicated model that you create.
If you are creating your knits for selling, then this Notebook will help you to stay organised with your Projects: you have a special area wher you can write it down how much yarn, tipe of needles, what accessories you will need.
Also you have an area to check your gauge…we know how important this could be…
The dimensions are 8 x 10 in (20 x 25 cm) so it’s perfect for your bag and you can take it everywhere with you.
Write everything down! This Notebook is a big help!
You can find it hier:
With love,
Doinita
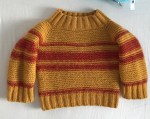
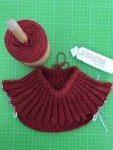
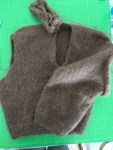
Yoke crosetat
Buna!
Daca intotdeauna ti-ai dorit sa-ti lucrezi propria bluza sau rochita si nu ai stiut cu ce sa incepi, iti propun sa incepi cu niste calcule.
Cum? Iti spun mai jos
- Vei avea nevoie de tensiunea de lucru si de circumferinta de la piept
- Adaugati lejeritate la circumferinta de la piept
- Daca pentru circumferinta de la piept avem 100 %, la circumferinta Yoke (piept + brate) vom avea 160% (30% pentru fiecare brat)
- Guler 40%*circumferinta piept (!!! Atentie; Daca lucrati cu bumbac atunci adaugati mai mult)
- Pentru fiecare inmultire de la Yoke eu adaug 33%
Si acum exemplificare
- tensiunea de lucru este: 10 cm = 25 ochiuri => 1 cm = 2,5 ochiuri
- Circumferinta piept: 100 cm + 10 cm = 110 cm => 110 cm * 2,5 ochiuri = 275 ochiuri
- Circumferinta Yoke; 160% * 100 cm = 160 *2,5 ochiuri = 400 ochiuri
- Guler 40% * 100 cm = 40 cm *2,5 ochiuri = 100 ochiuri
- prima inmultire: 0,33 *100 =33 => 100 / 33 = 3,03 la fiecare al 3-lea ochi facem o inmultire. Ochiurile finale vor fi deci (33*3)+1+33 =133 ochiuri >>>> 33 de ochiuri intra de 3 ori in 100 de ochiuri si ne ramane 1 ochi pe care il lucram asa cum este el si adaugam cele 33 de ochiuri pe care tocmai le-am adaugat la fiecare inmultire <<<<
- apoi lucram cateva randuri fara inmultire
- a doua inmultire: 0,33 * 133 ochiuri = 43,89 => aleg 44 ochiuri => deci 133 / 44 = 3,02 la fiecare al 3-lea ochi facem o inmultire. Ochiurile finale vor fi deci: (3*44)+1+44 = 177 ochiuri
- Se lucreaza cateva randuri ca sa se aseze modelul
- a treia inmultire: 0,33*177 = 58 => 177/58 =3 => la fiecare al 3-lea ochi facem o inmultire. Ochiurile finale vor fi deci: (3*58)+3+58 = 235 ochiuri >>>>> 3*58 = 174 dar noi avem 177 deja lucrate deci, 3 ochiuri le vom lucra asa si adaugam 58 de ochiuri fix cate am inmultit <<<<<
- lucram iarasi cateva randuri ca sa se aseze modelul
- lucram tot asa pana ajungem sa avem toate cele 400 de ochiuri pentru Yoke
Impartim fata/spate si brate:
400 de ochiuri Yoke – 276 (piept) = 124 ochiuri ne raman pentru maneci
Subrat eu intotdeauna adaug 8% * circumferinta piept => 0,08 * 100 = 8 cm * 2,5 ochiuri = 20 de ochiuri de adaugat pt fiecare subrat.
276 / 2 = 138 pentru fata si 138 pt spate. Sau adaugati mai mult pentru fata decat pt spate pentru ca fata este mai proeminenta decat spatele. SI invers pentru bluzele barbatilor (pentru ca ei au spatele mai lat).
Sper ca aceste calcule v-au fost de ajutor!
Va pup si va doresc sa va iasa toate calculele! :-))

Buna sa-ti fie ziua!
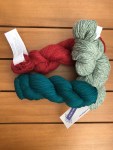
Probabil ca ai primit in dar niste fire sau probabil ca, intr-o zi te-ai trezit intrand intr-o mercerie si ti-au furat privirea niste fire pe care nu le-ai putut lasa acolo pentru ca visai ca intr-o zi sa iti lucrezi propria ta bluza.
Probabil ca ai pe undeva o croseta sau niste andrele si niste fire super frumoase si te-ai decis sa te reintorci in copilarile si sa iti creezi propria bluza dar….
…stai ca nu mai stii de unde sa incepi!
Pai, iti spun eu! 🙂
Incepi de la calcule! 🙂
Daca incepi sa calculezi, inainte de a pune mana pe fir si pe ustensile, atunci ai mari sanse ca sa nu mai desiri, ca sa nu mai desfaci si faci ne ‘n ori.
SI daca nu mai stii ce anume trebuie sa calculezi, iti spun in video-ul de mai jos.
Si iti mai spun ca ai nevoie decat de o masuratoare.
Toate detaliile aici sau mai jos.
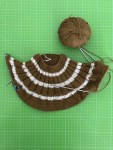
Make your own ecological sponge
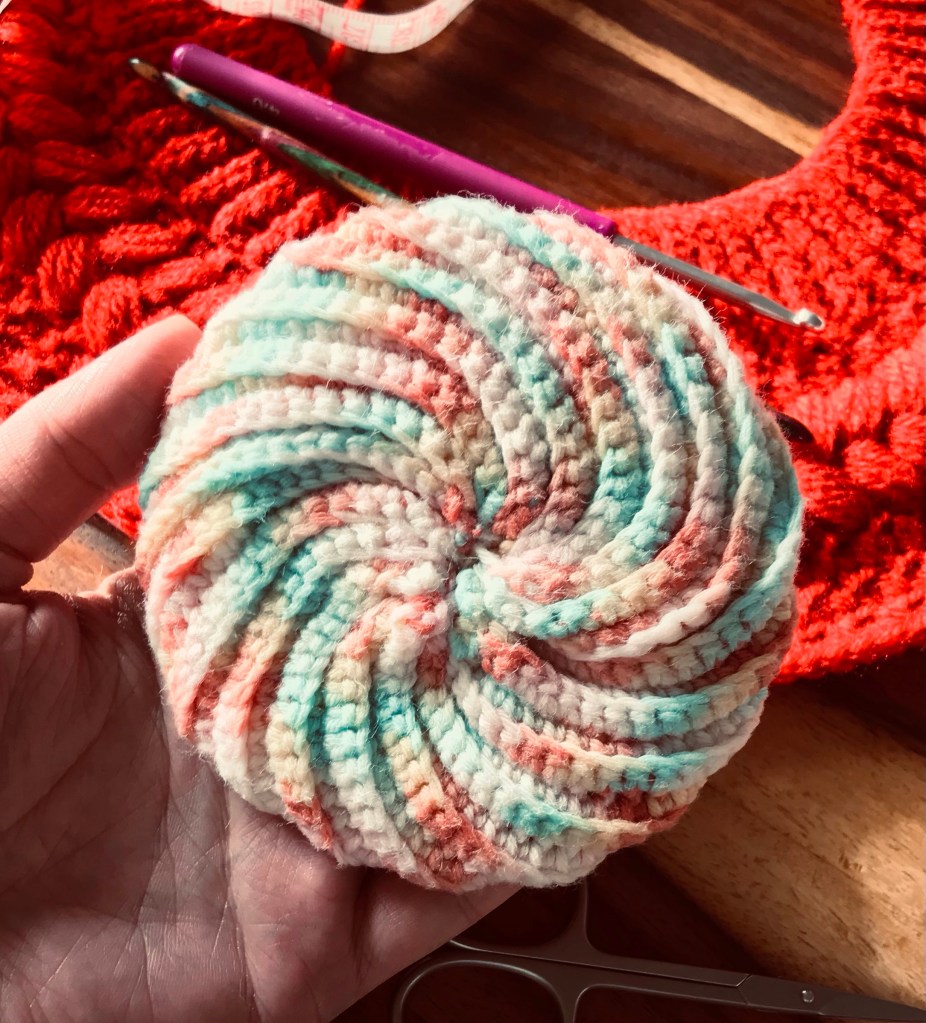
Hi,
Here 👇🏼 you can find how to make your eco cosmetics sponge 😍
I have used 2,75mm hook, 100% cotton
Start by making a chain of 36 sts
Setting row
Decrease first 2 sts, sc till the last st, increase 2 sts in the last sts, ch1 turn
From now on, always work only in the back loop.
R1.
Increase 2 sts in the first st, sc till the last 2 sts, decrease last 2 sts
R2
Decrease first 2 sts, sc till the last st, increase 2 sts in the last sts, ch1 turn
Repeat R1 and R2 till you will reach the same width as your length. Join as you see in the video.
Happy crocheting 🧶
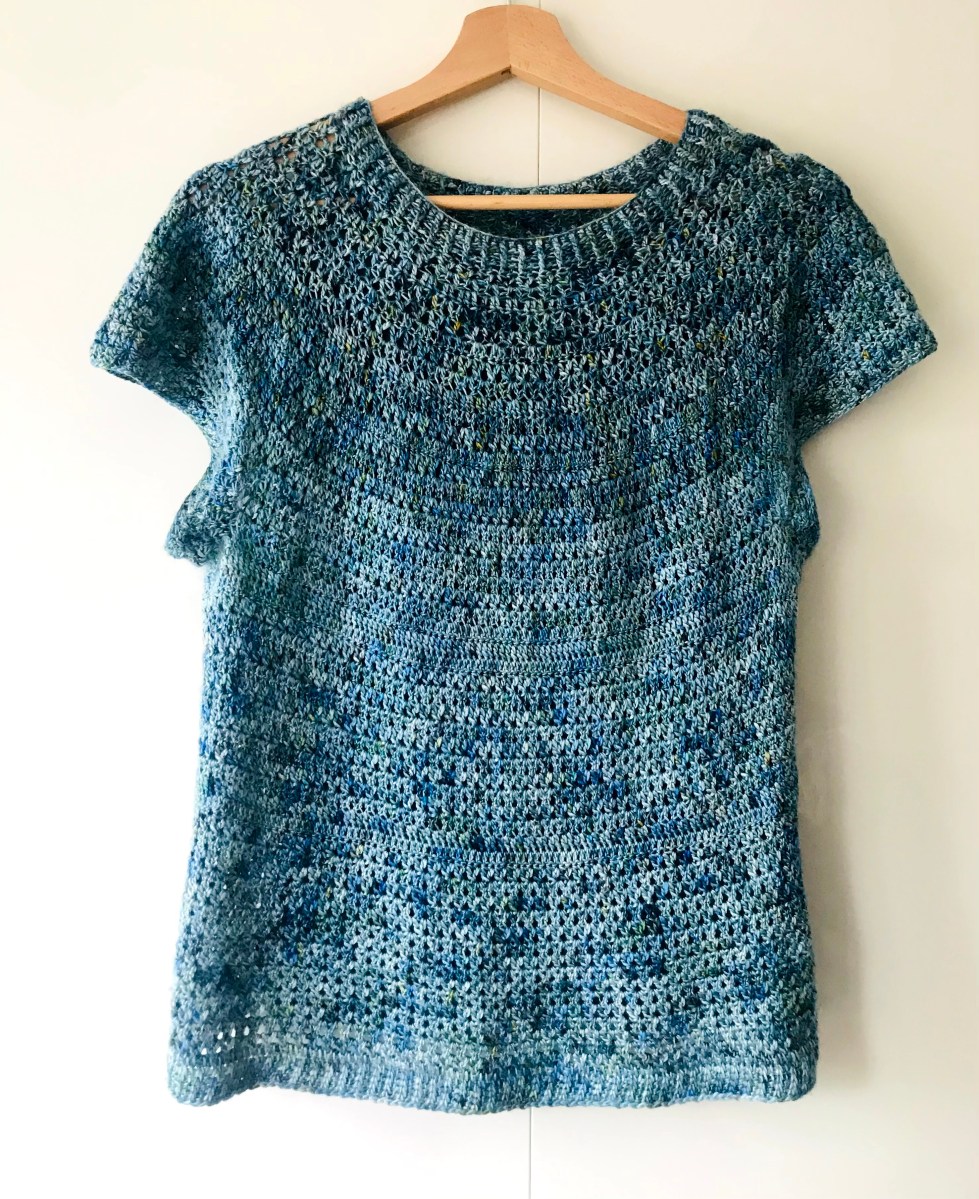
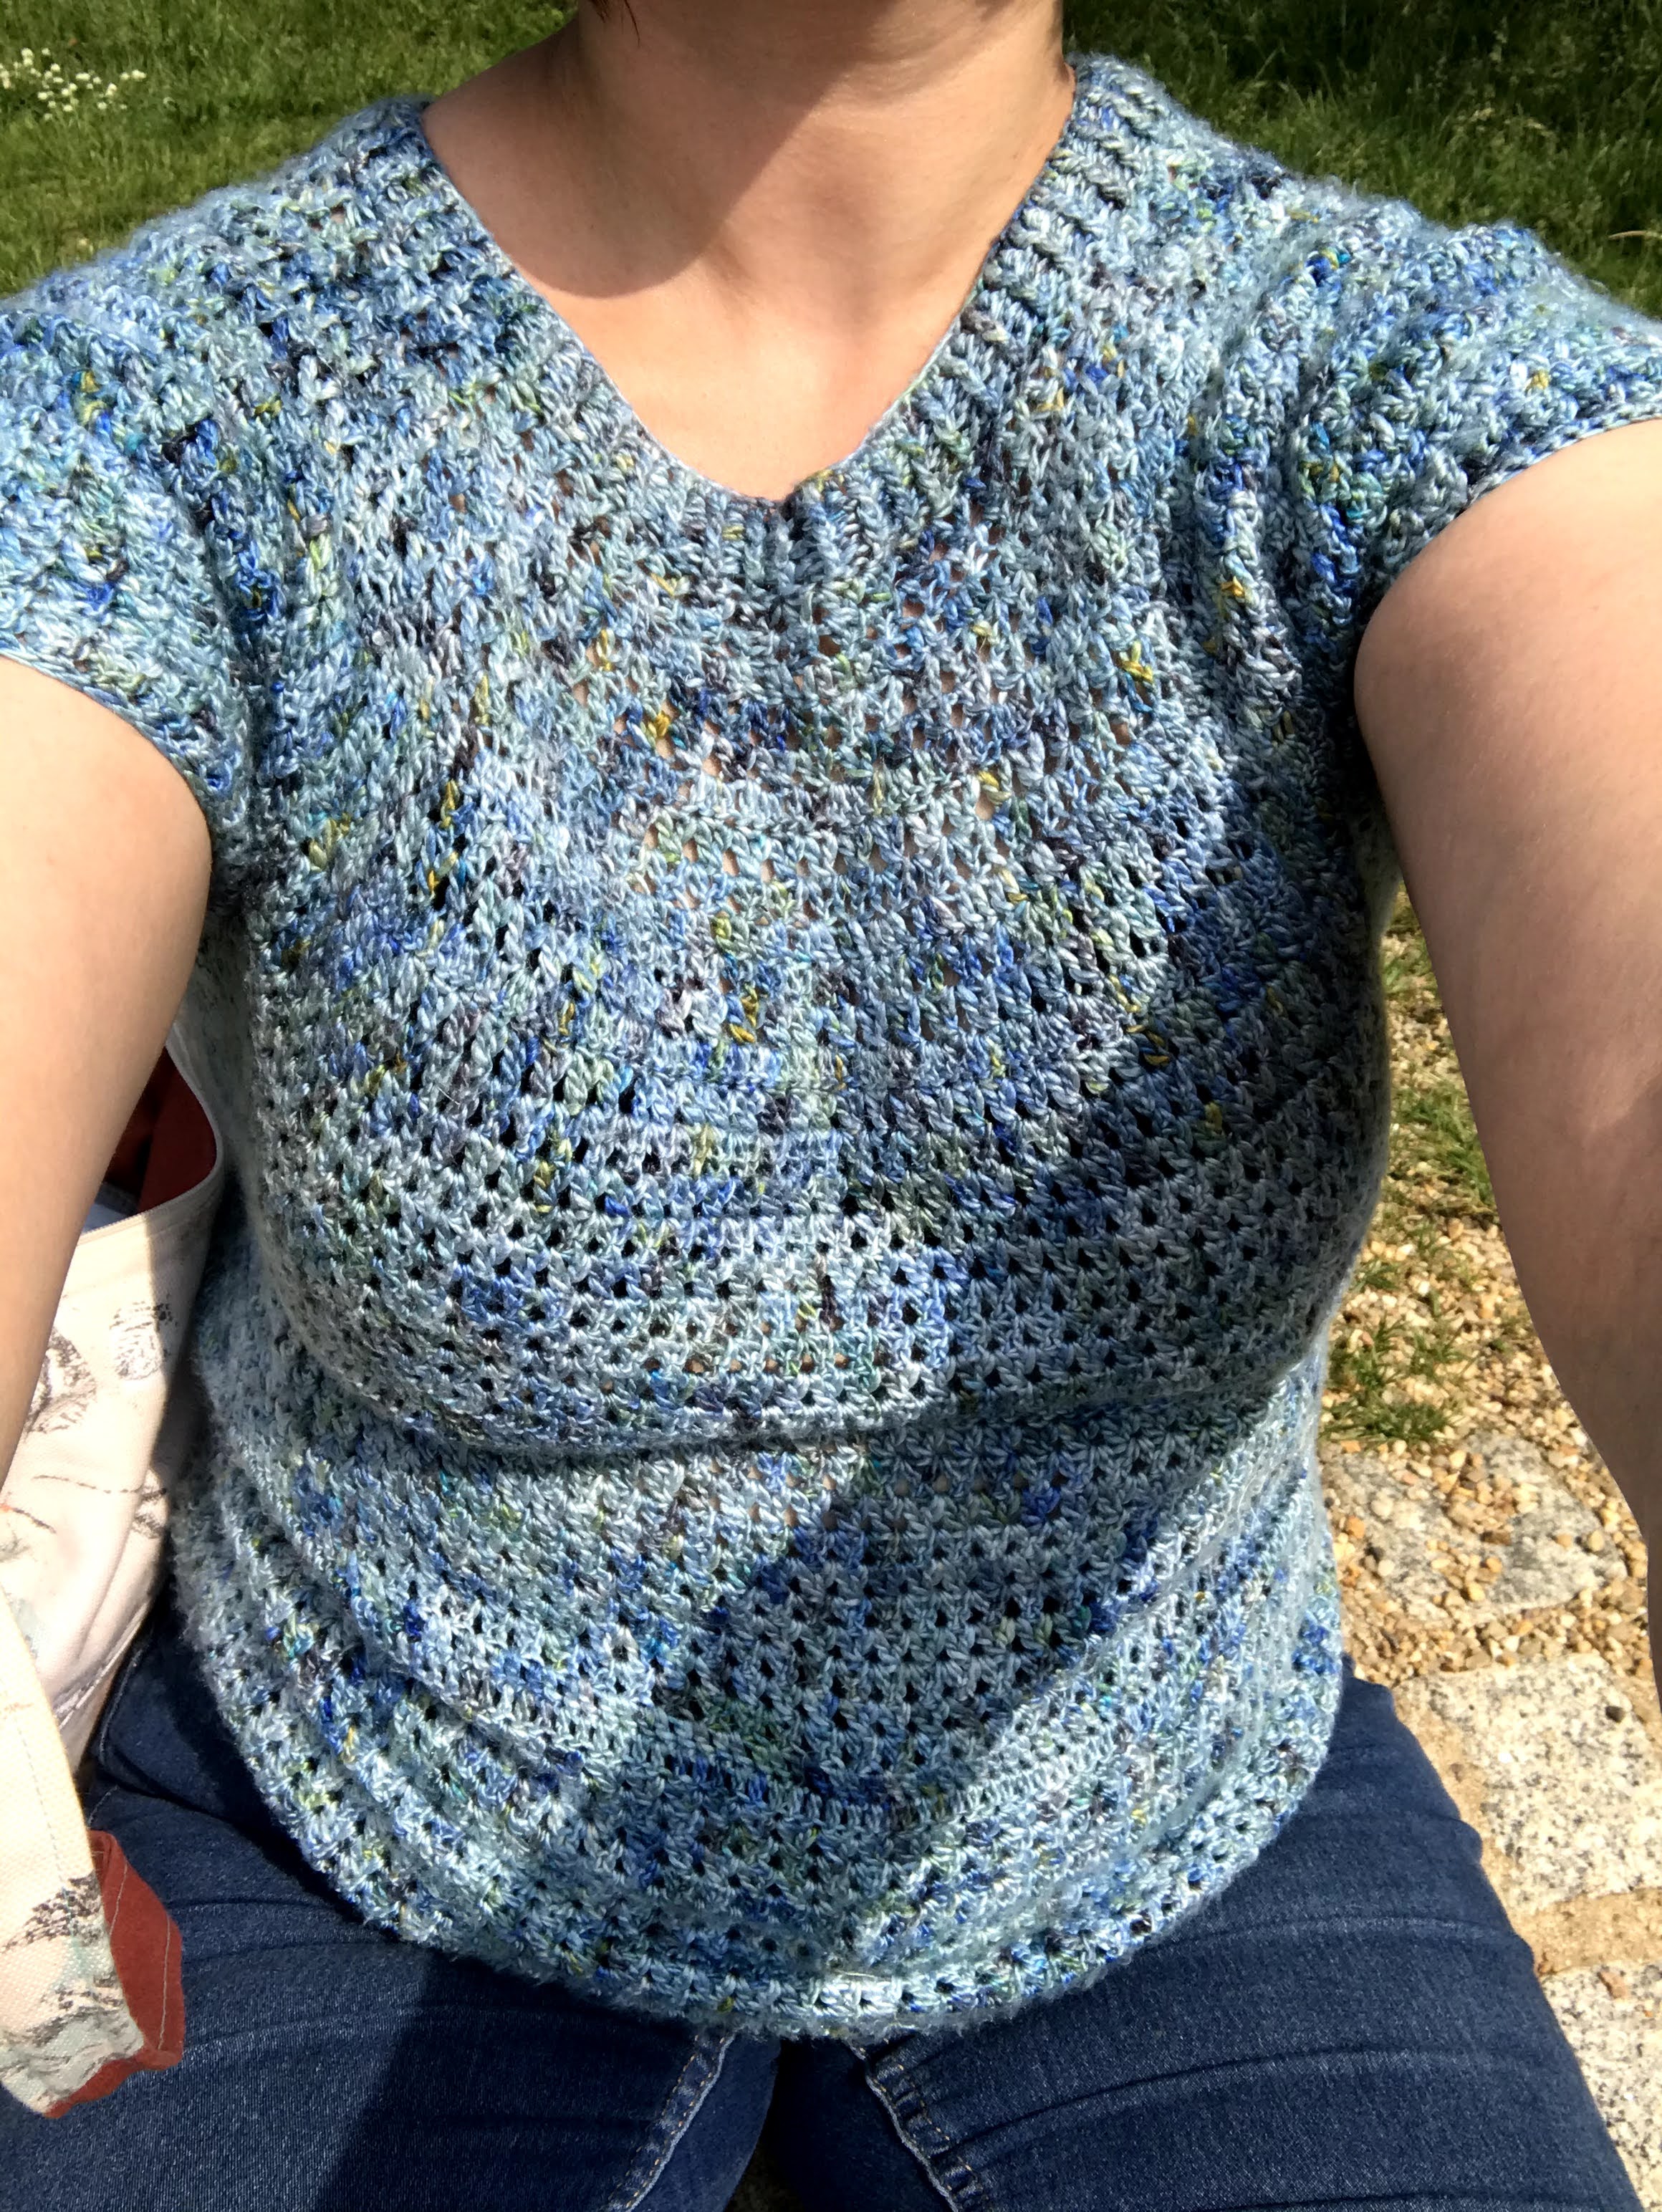
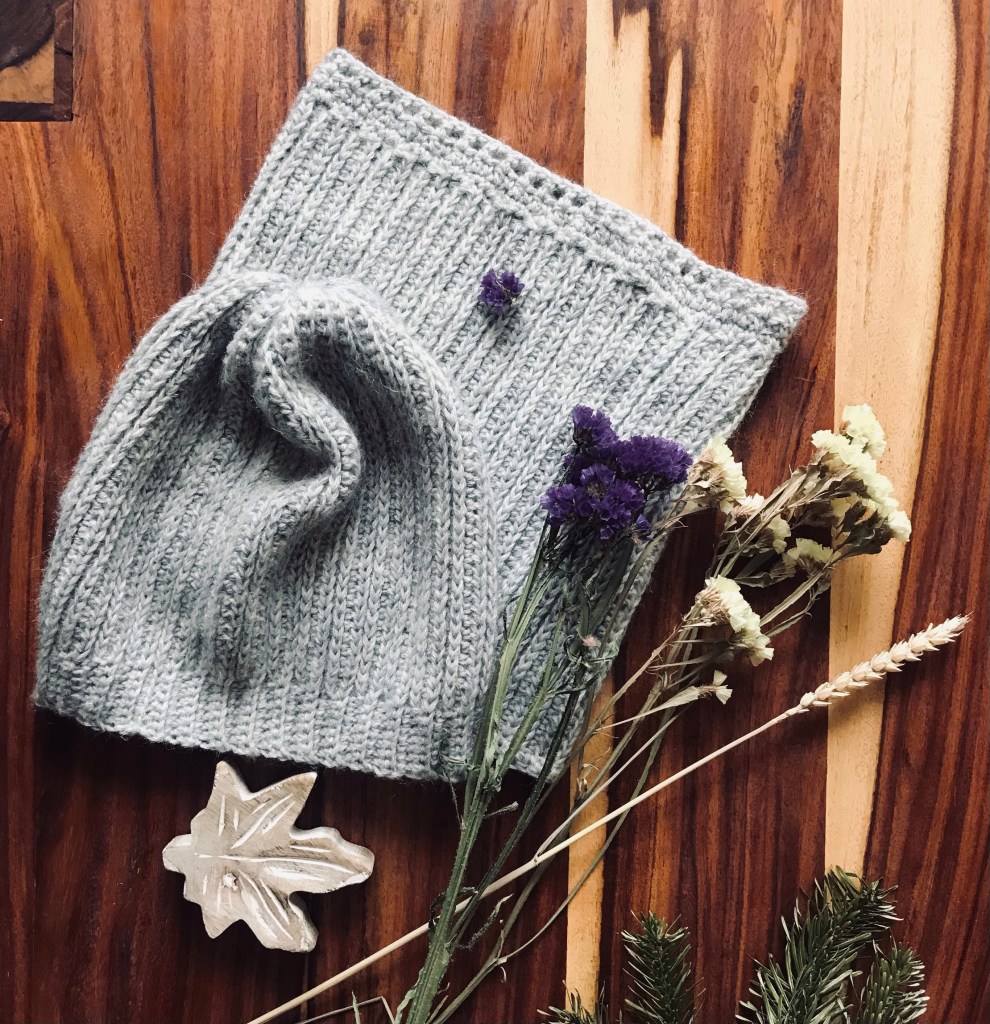
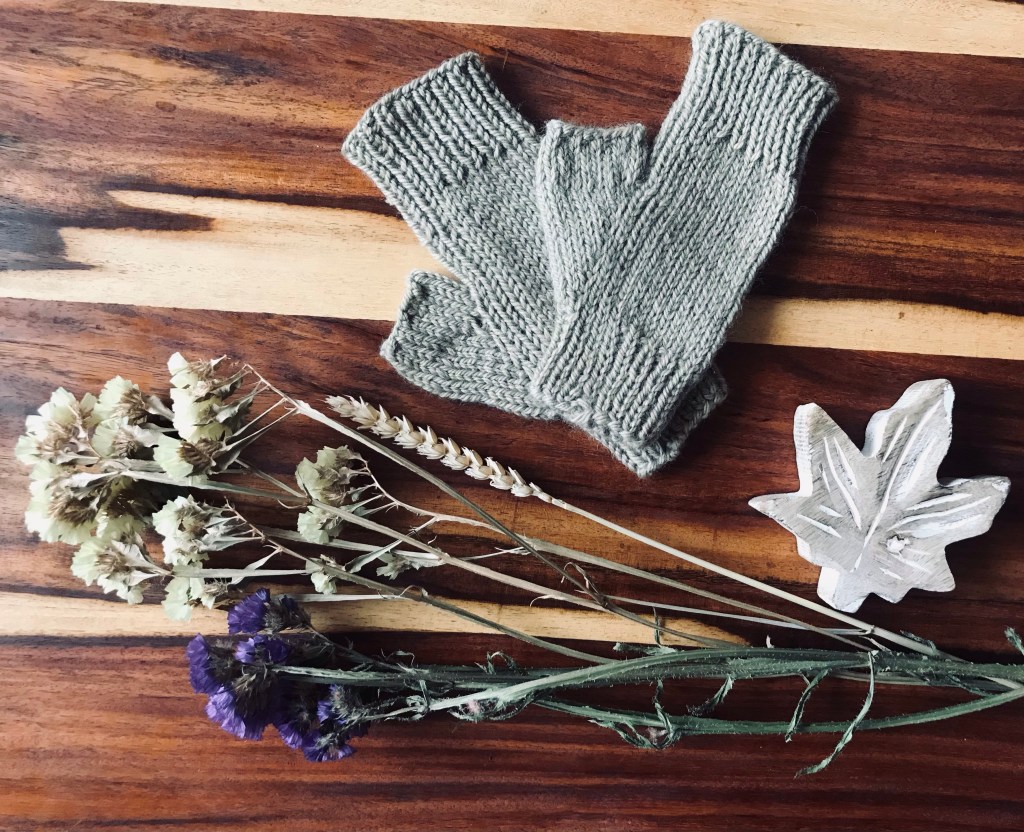
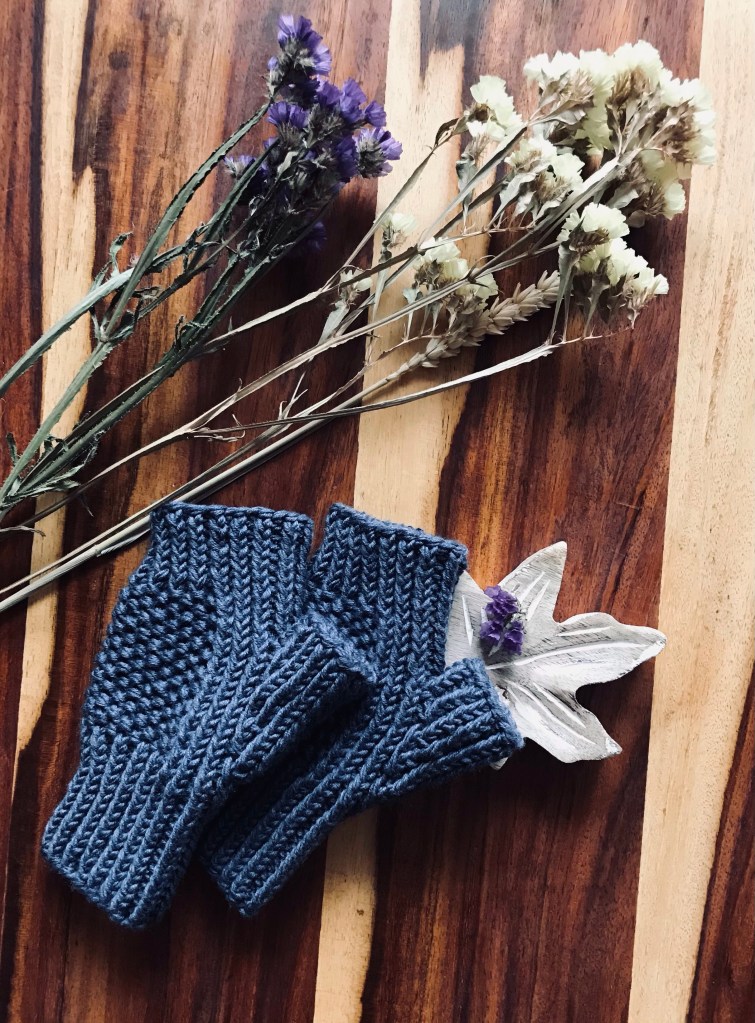
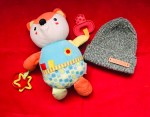
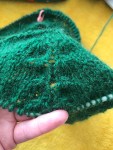
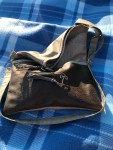
One week work
Hi,
I am very proud of myself.
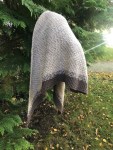
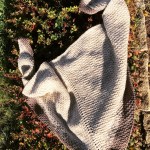
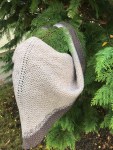
With greatest pleasure, I am showing you my one week work.
I hope you enjoy it also

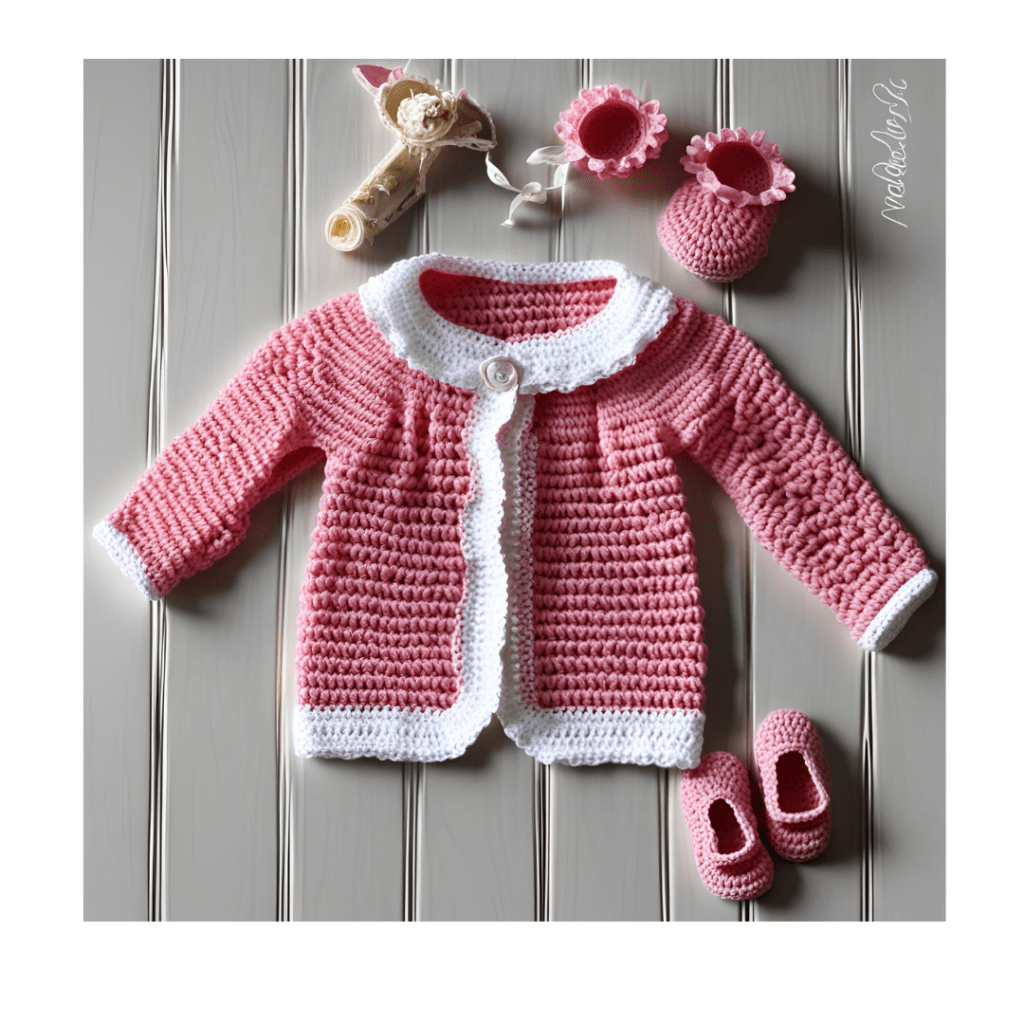
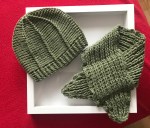
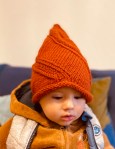
Crochet a Beanie for 0 to 3 years baby

by Ditza Harseim
https://www.youtube.com/channel/UCPANybCDUnGPDeZfs-d8CmA
https://www.ravelry.com/people/DitzaIsGreat
SKILLS
You need to know how to:
Cast on = co
Half double crochet = hdc
Place marker = pm
Slip stitch = sl st
Single crochet = sc
Also, you have to know which is the front loop and back loop in the stitches.
Good to know
This hat is worked flat and then joined with a slip stitch. Then, the long tail from the beginning of the work will go through all the stitches from the top of the hat and secured.
The ribbing is formed from hdc and sc ( Please see below the explanation for it), a “body” formed only with hdc (please, see here the video with the stitch) and a top of the hat.
The top of the hat is worked from 5 loose sc in the odd rows and 5 sc in the even rows.
The ribbing is worked as following:
- In the odd rows: 5 hdc in the back loop
- In the even rows: 5 sc in the front loop
I have used 3,5 mm (US is E-4) hook and yarn from Rico Design, Creative Soft Wool Aran (wool and acrylic). Has a very soft look.
The gauge for this hook and yarn is:
Also, for another hat, I have used 4,5 mm (US is G) hook and yarn from Drops, Nepal (wool and alpaca). This one has a more rustic look.
The gauge for this hook and yarn is:
10 cm ( 4 in ) = 17 sts & 13 rows
Working instructions:
Leave a long tail and Cast on:
- 25+1 sts for a newborn
- 27+1 sts for 1-3 months
- 29+1 sts for 3-6 months
- 30+1 sts for 6-9 months
- 32+1 sts for 9-12 months
- 35+1 sts for 12-18 months
- 39+1 STS for 2-3 years
=> till here all the ribbing will have 5 sts and in the top 4 sts
Base:
1 sc in the 2nd st from the hook and 3 more sc in the next 3 sts (this will be the ribbing of the hat) pm and work 16, 18, 20, 21, 23, 25, 30 hdc in the next 16, 18, 20, 21, 23, 25, 30 sts, pm and 4 sc in the last 4 sts => total of 25, 27, 29, 30, 32, 34, 39 sts, ch 1 turn the work
Row 1
The top of the hat: make 4 loose sl sts, 16, 18, 20, 21, 23, 25, 30 hdc into the 3rd loop (as shown in this video) and 5 hdc in the back of the loop (for the ribbing of the hat)
Row 2
The ribbing of the hat: make 5 sc in the back of the loop, 16, 18, 20, 21, 23, 25, 30 hdc in the back of the loop and 4 sc in the back of the loop, ch 1 and turn
Repeat row 1 and row 2 for 34, 36, 38, 40, 42, 44, 46 rows and then slip stitch from the rib up to the top of the hat. Secure the yarn, cut and wave in ends.
Darn a tapestry needle with the yarn you let at the beginning and pass it through all the stitches at the top of the hat, and secure it properly. You can leave it like that or add a pompon.
I hope you like It And you have enjoyed crocheting it.

Happy day and take care of you,
Ditza


You must be logged in to post a comment.