
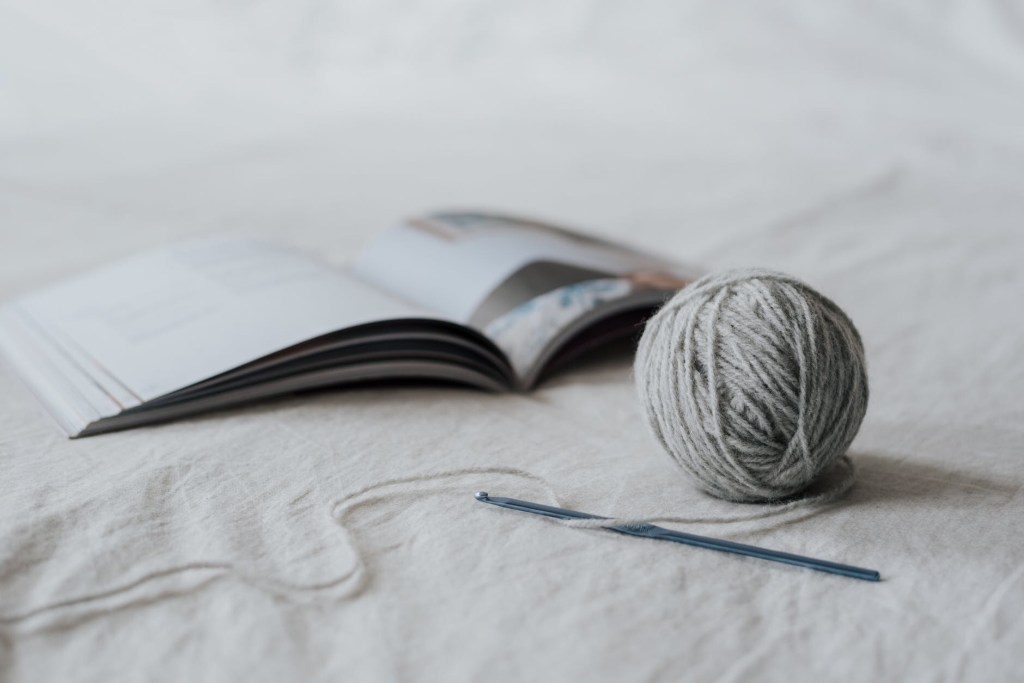
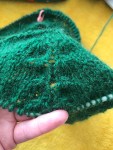
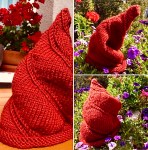
Crochet a Beanie for 0 to 3 years baby

by Ditza Harseim
https://www.youtube.com/channel/UCPANybCDUnGPDeZfs-d8CmA
https://www.ravelry.com/people/DitzaIsGreat
SKILLS
You need to know how to:
Cast on = co
Half double crochet = hdc
Place marker = pm
Slip stitch = sl st
Single crochet = sc
Also, you have to know which is the front loop and back loop in the stitches.
Good to know
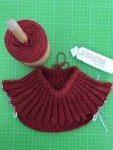
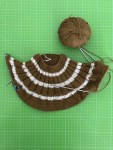
This hat is worked flat and then joined with a slip stitch. Then, the long tail from the beginning of the work will go through all the stitches from the top of the hat and secured.
The ribbing is formed from hdc and sc ( Please see below the explanation for it), a “body” formed only with hdc (please, see here the video with the stitch) and a top of the hat.
The top of the hat is worked from 5 loose sc in the odd rows and 5 sc in the even rows.
The ribbing is worked as following:
- In the odd rows: 5 hdc in the back loop
- In the even rows: 5 sc in the front loop
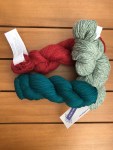
I have used 3,5 mm (US is E-4) hook and yarn from Rico Design, Creative Soft Wool Aran (wool and acrylic). Has a very soft look.
The gauge for this hook and yarn is:
Also, for another hat, I have used 4,5 mm (US is G) hook and yarn from Drops, Nepal (wool and alpaca). This one has a more rustic look.
The gauge for this hook and yarn is:
10 cm ( 4 in ) = 17 sts & 13 rows
Working instructions:
Leave a long tail and Cast on:
- 25+1 sts for a newborn
- 27+1 sts for 1-3 months
- 29+1 sts for 3-6 months
- 30+1 sts for 6-9 months
- 32+1 sts for 9-12 months
- 35+1 sts for 12-18 months
- 39+1 STS for 2-3 years
=> till here all the ribbing will have 5 sts and in the top 4 sts
Base:
1 sc in the 2nd st from the hook and 3 more sc in the next 3 sts (this will be the ribbing of the hat) pm and work 16, 18, 20, 21, 23, 25, 30 hdc in the next 16, 18, 20, 21, 23, 25, 30 sts, pm and 4 sc in the last 4 sts => total of 25, 27, 29, 30, 32, 34, 39 sts, ch 1 turn the work
Row 1
The top of the hat: make 4 loose sl sts, 16, 18, 20, 21, 23, 25, 30 hdc into the 3rd loop (as shown in this video) and 5 hdc in the back of the loop (for the ribbing of the hat)
Row 2
The ribbing of the hat: make 5 sc in the back of the loop, 16, 18, 20, 21, 23, 25, 30 hdc in the back of the loop and 4 sc in the back of the loop, ch 1 and turn
Repeat row 1 and row 2 for 34, 36, 38, 40, 42, 44, 46 rows and then slip stitch from the rib up to the top of the hat. Secure the yarn, cut and wave in ends.
Darn a tapestry needle with the yarn you let at the beginning and pass it through all the stitches at the top of the hat, and secure it properly. You can leave it like that or add a pompon.
I hope you like It And you have enjoyed crocheting it.

Happy day and take care of you,
Ditza
Un alt Look al piciorusului dublu redus

Piciorușul dublu redus poate crea acel model frumos de tricotat.
Mai multe detalii in video 👇🏼
Zi frumoasa sa ai,
Ditza
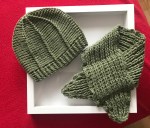
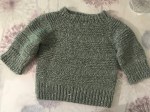
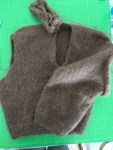
A New baby Beanie in the family
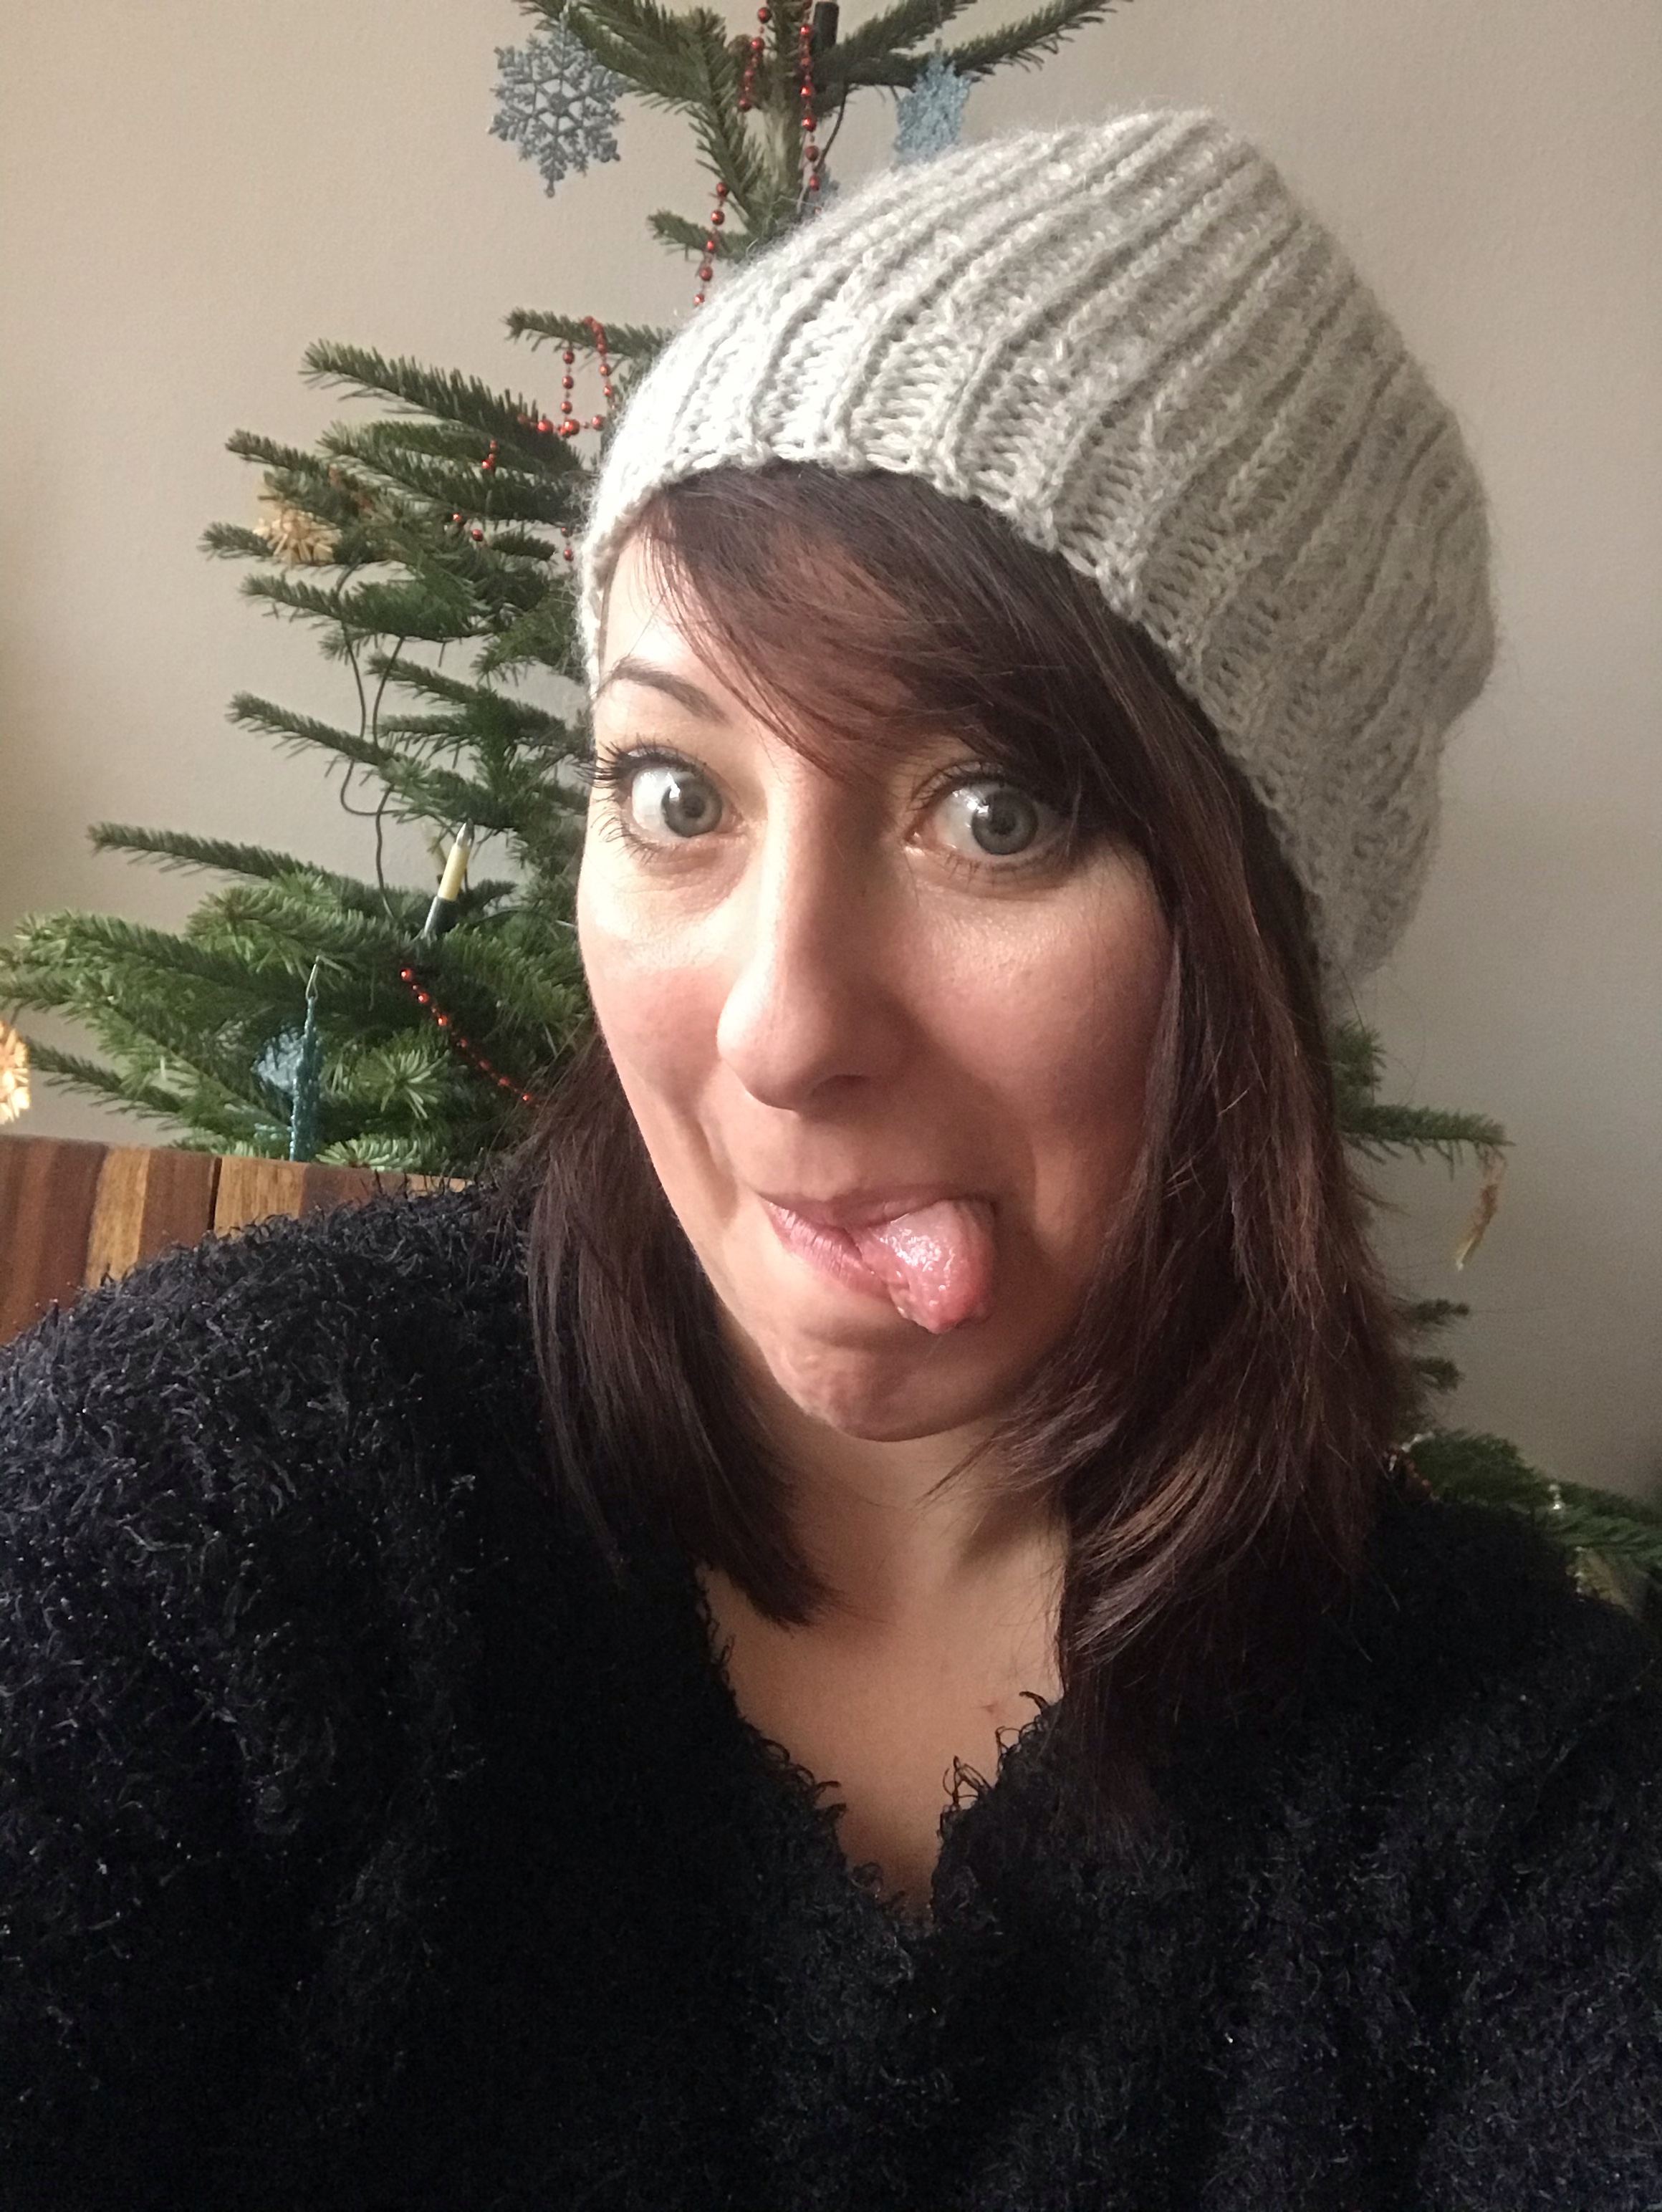
Hi, lovely One.
I have made this beautiful and super easy beanie, after @Tinnahekl pattern and I have just enjoyed and loved the finished item.
I hope you like it also.
See you soon,
Ditza

Happy 1st Advent day

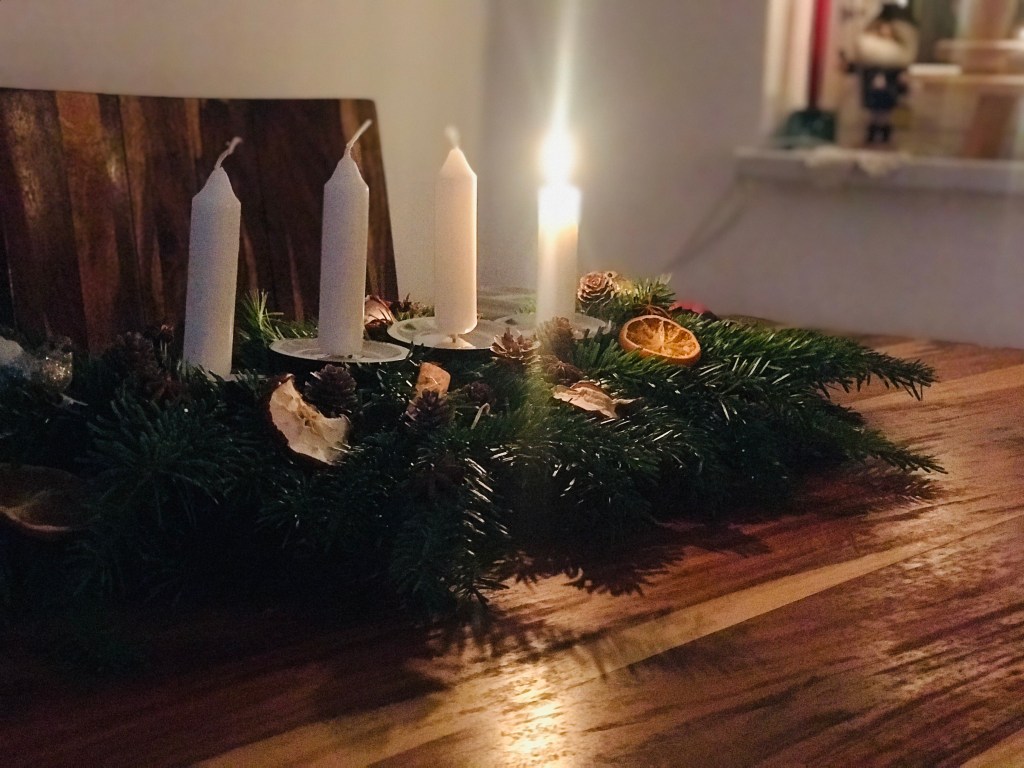


Hi, beautiful soul,
Wherever you are, whatever you do, I hope that you have a happy, wonderful day.
With love,
Ditza
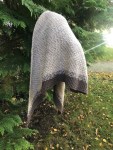
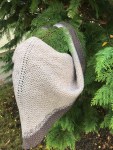
Cables and ice flowers
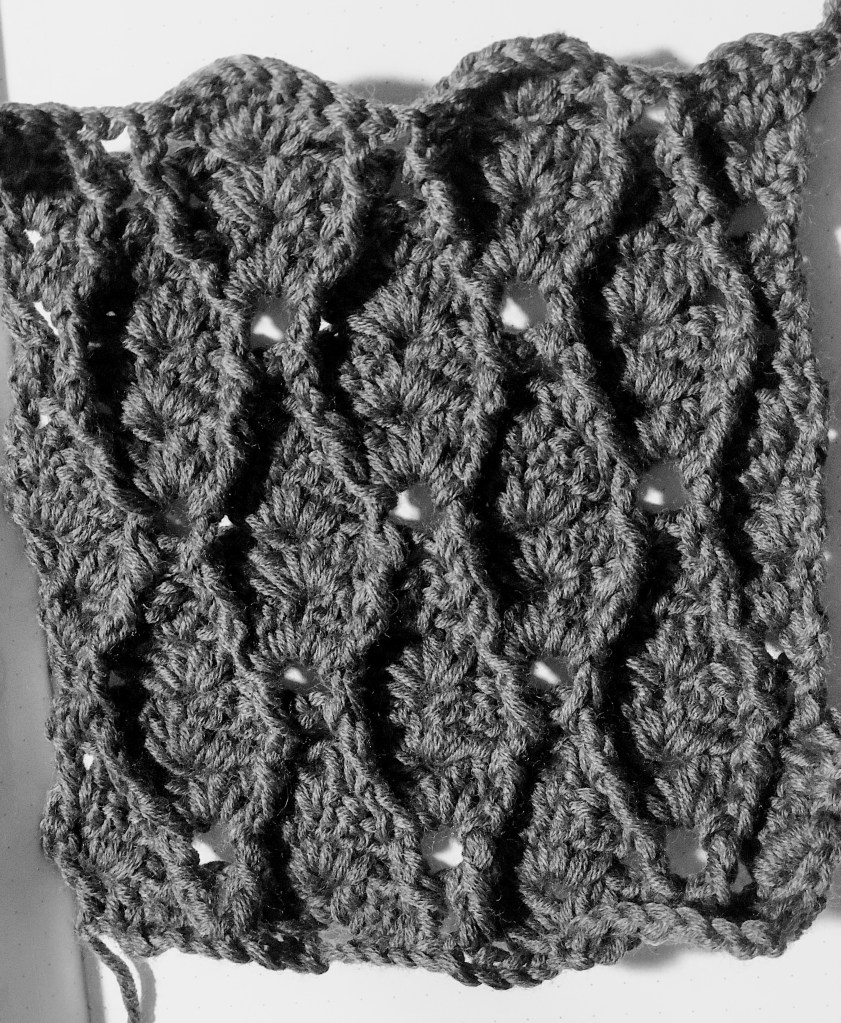
Hello, beautiful you,
I am happy to give you the written instructions for this beautiful stitch. The video was released. You can find it here
The stitch is borrowed from a book that I have bought and reproduced after the diagram. Written instructions are done by me.
You will need a repetition of 10 stitches + 1 (if you will work flat) and 6 rows to repeat.
For the sample above, I have used a 3,00 mm (C/2 US; 11 UK). I have started with 37 stitches and I had 11,5 cm and two times repetition of the repetitive rows so, I had 14 rows = 13 cm.
- Beg = begging
- bpdc = back post double crochet
- Ch = chain
- CO = cast on
- dc = double crochet
- fpdc = front post double crochet
- Prev r= previous row
- rep = repeat
- St(s) = stitches
Following instructions are for working flat:
CO a multiple of 10+1 sts
Every beg of the row is created from 1 dc, ch 1 and ends with ch 1, dc in the last stitch.
When you turn your work, fpdc is worked bpdc and bpdc will be worked fpdc.
R1 – setting the stitch
In the 6th st from the hook, work 3 dc,
*(Skip 3 sts and in the 4th st work 3 dc, ch1, 3 dc. Skip 3 sts and in the 4th st, make 1 dc, ch 1, skip one st , make 1 dc)* repeat till you will have 4 sts; work 3 dc in the 3rd st, ch 1 and work a dc in the last st. Ch 1 turn your work
R2 – setting the stitch
Create the beg of the row st, ch 1
In the prev ch1, make 3 dc
Bpdc in the prev dc,
(ch 1, bpdc in the prev dc. Skip prev 3 dc and work the sequence 3dc, ch1, 3dc in the ch1, skip prev 3 dc and work Bpdc in the prev dc, ch 1)-*repeat
bpdc in the prev dc, * repeat
Work 3 dc in the last ch 1 from the prev , ch1, work the last dc, turn
R3 – 1st row of repetitions
Dc, ch1, dc in the prev ch1, fpdc in the prev bpdc, in the prev ch1 make 2 dc *(ch1, 2dc, fpdc in the prev bpdc, dc, ch1, dc in the prev ch1, fpdc in the prev bpdc, dc in the prev ch1)* repeat till the last ch1 and make 1sc, ch1, 1dc, ch1 turn
R4 – 2nd row of repetitions
Dc, ch1, bpdc in the prev fpdc, in the prev ch1 work 3dc *(ch1, 3dc, bpdc in the prev fpdc, ch1, bpdc in the prev fpdc, 3 dc in the prev ch1)* repeat till the end of the row, fpdc in the prev ch1, ch1, 1 dc, ch1 turn
R5 – 3rd row of repetitions
Dc, ch1, fpdc in the prev bpdc, work 3 dc in the prev ch1, *(ch 1, 3 dc, fpdc in the prev bpdc, ch1, fpdc in the prev bpdc, 3 dc in the prev ch1)* rep till the last bpdc and work a fpdc, ch1, dc, ch 1, turn
R6 – 4th row of repetitions
Dc, ch 1, work 2 dc in the prev ch1, bpdc in the prev fpdc *(in the prev ch 1 work 1 dc, ch1, 1dc, bpdc in the prev fpdc, in the prev ch1, work 2 dc, ch1, 2dc, bpdc in the prev fpdc)* rep till the last ch1 and work there 3 dc, ch1, dc, ch1 and turn
R7 – 5th row of repetitions
Dc, ch1, 3 dc in the prev ch1, *(fpdc in the prev bpdc, ch1, fpdc in the prev bpdc, 3 dc in the prev ch1, ch 1, 3dc, fpdc in the prev bpdc)* rep till the end of the row and in the prev ch1, make 3 dc, ch1, dc, ch 1 turn
R8 – 6th & last row of repetitions
Dc, ch1, 3 dc in the prev ch1, bpdc in the prev fpdc, ch1 *(bpdc in the prev fpdc, in the prev ch1 work 3dc, ch1, 3dc; bpdc in the prev fpdc; ch1)* rep till the last prev fpdc and work there a bpdc, work 3 dc in the prev ch1, ch1, dc, ch1 turn
Repeat rows 3 to 8 for as long as you wish.
I hope you enjoyed it.
Happy crocheting and see you soon. 🤚🏼
Ditza
Ps: if you have any suggestions, please, don’t hesitate to write to me.
Promotion Elven Hat
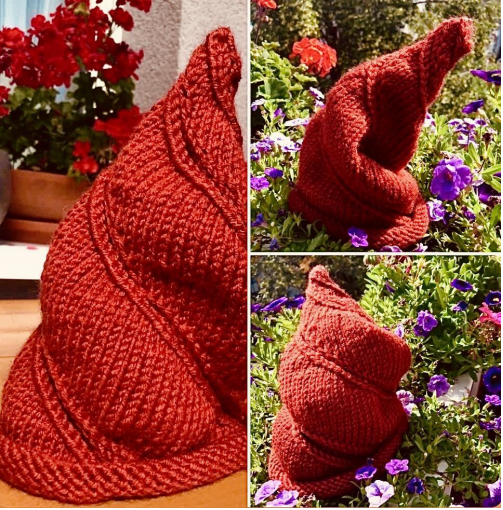
Holidays are close and I am offering a promotion for my Elven hat.
Use code: “HMC” and you will have 75% off when you buy it. Buy it from here 👇🏼
https://www.ravelry.com/redeem/make-it-beautiful-designs?code=HMC
Happy holidays and happy knitting 🧶
When you don’t know exactly where something leads you to…

Hello to you and I wish you a very good day.
Ditza here.
Today I will be short and I would like to give you a hint or, better said, a ready made questionnaire for you to complete, in the times when you don’t know for sure if the new goal that you have just set, will help you in your needs or you have to add more resources.
This questionnaire can be used in all situations in your life. So, use it whenever you feel stuck😃
Read MorePrinciples and processes in design
As a designer, you find inspiration in almost everything.
You look at a movie and you see something that attracts your look.
Sometimes, a shape or a texture of a building makes you dream to create an unique look of a garment.
You see a field in blossom and you feel in love with the beauty of the colors and of the flowers.
The secret is that, when you have plenty, you have to save it, to store it somewhere.
Whenever the inspiration comes, sketch it, write it somewhere. Don’t be afraid to use colors and add yarn and fibers.
Also, it’s a good idea to invest in a design notebook. Look on the internet and you will find some.
Another process in the designing world is to work with drape. As a designer you have to work with drape for aesthetics and utility.
Drape is how a fabric or garment hang or falls.
To control it, you need to work with tension, stitch patterns and fibers.
In order to control the drape and to learn more about this process, you will have to do a lot of swatches and then you have to “dress” them.
What means to “dress” a tension swatch?
First, you have to create that swatch. Even if you Crochet or Knit it, it must be at least 15 by 15 cm.
Then, you have to wash and dry it like the etiquette tells you.
The 3rd step is to block the swatch, just like you would block the final garment.
The last step is to hang the swatch (after it got dried). You hang the swatch like following:
– run a knitting needle through the top and bottom of the swatch
– clip the top to a hanger
– clip the rest of the ball of yarn to the bottom and leave it like that for a day.
These three processes approximates the weight that the finished garment will have.
I have an exercise for you do to.
You will have to create four swatches.
You will have to use the same stitch, the same needle or hook and, as much as possible, the same weight of yarn.
Please use for one pure cotton, for another one 100% acrylic, for the third 100% your preferred wool and for the fourth, a yarn of your choice.
You will have to “dress” all your swatches.
At the end, note in your notebook, what did you notice about the finished swatches? Which one has grown the most and which one the least? Which one draped the most beautiful?
Thank you for reading this and see you soon.
Bye 👋
A very unique garment?
You might ask yourself why should you start designing your own clothes when there are so many people designing garments or, so many clothes already in the shops.
Or, maybe, you think that this is an easy thing, as you’ve been knitting or crocheting for a lifetime.
Or, maybe, for you it’s a hard or impossible thing because you lack of some knowledge in this area and, anyhow, you don’t look like a designer.
Well, I can tell you for sure that a designer have exactly your look and, if you don’t like the idea of creating your own clothes, it’s ok to go and buy them from the shop, just that you will look the same like all the other people.
If you wanna be unique, you can make your own clothes or you can ask someone to make them.
In this way, you will know exactly what yarn was used and that was made especially for you.
When you create your own clothes, you know exactly that that garment is unique, only because no one else is knitting or crocheting like you! Each one of us is unique.
Your body is unique and therefore, you can create the pullover exactly as you wish.
Happy knitting or crocheting your very unique pullover.
Update:
I have some videos about this sweater. You can find them here:
Freestyle Yoke – part one, yarn, Yoke technique
Freestyle Yoke- part 2, separate the body and the sleeves from the yoke
Till next time, byyyeee
Christmas is coming to town
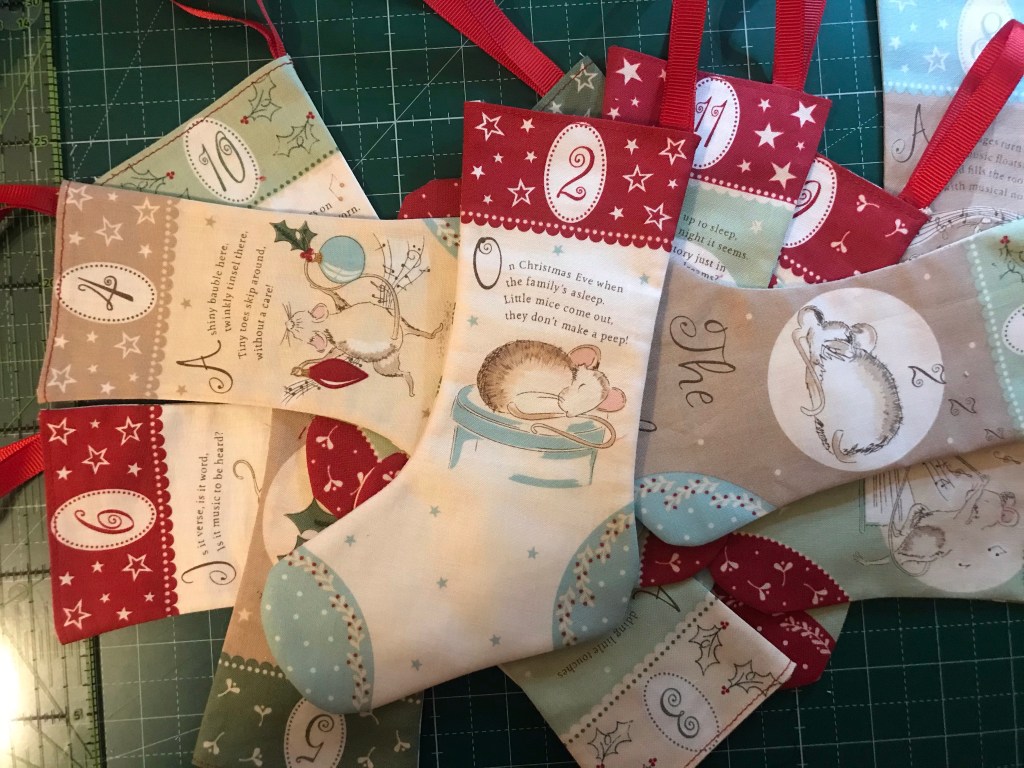
Hello, beautiful you,
With a panel I have bought from Debbie Shore Sewing, I have made 12 socks for an Advent Calendar
You can find here, all her wonderful fabrics.
And here, you can see the video with the panel and how I have made it.
Happy sewing and take care of you,
Ditza
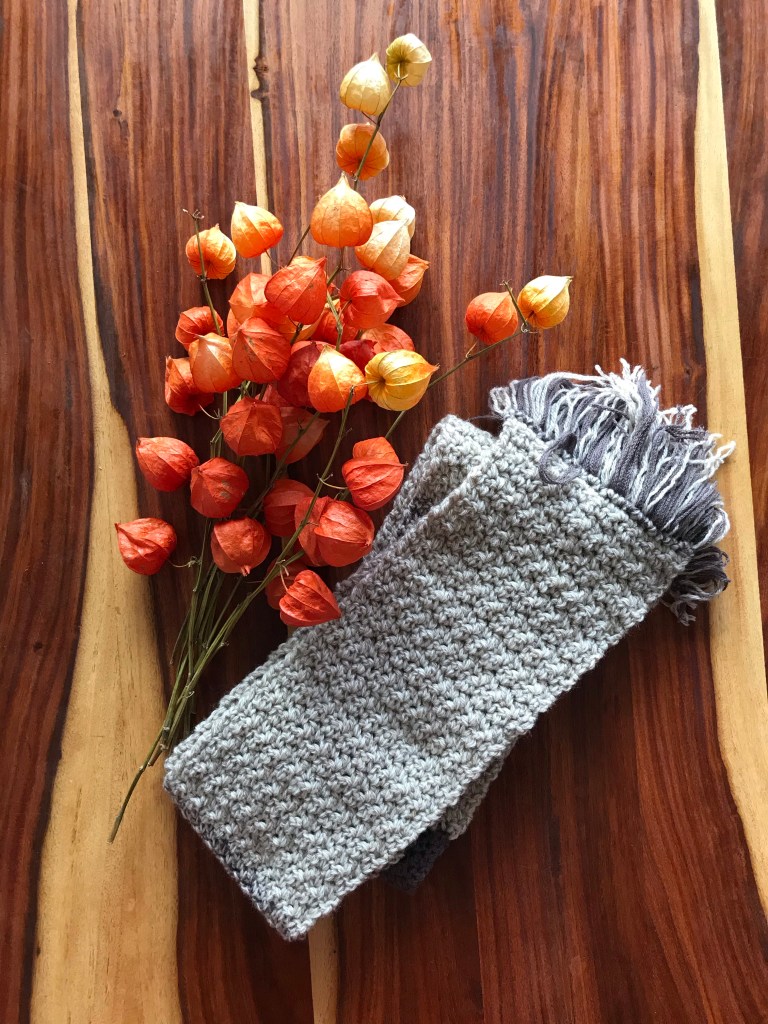
Un model ușor, elegant și rapid
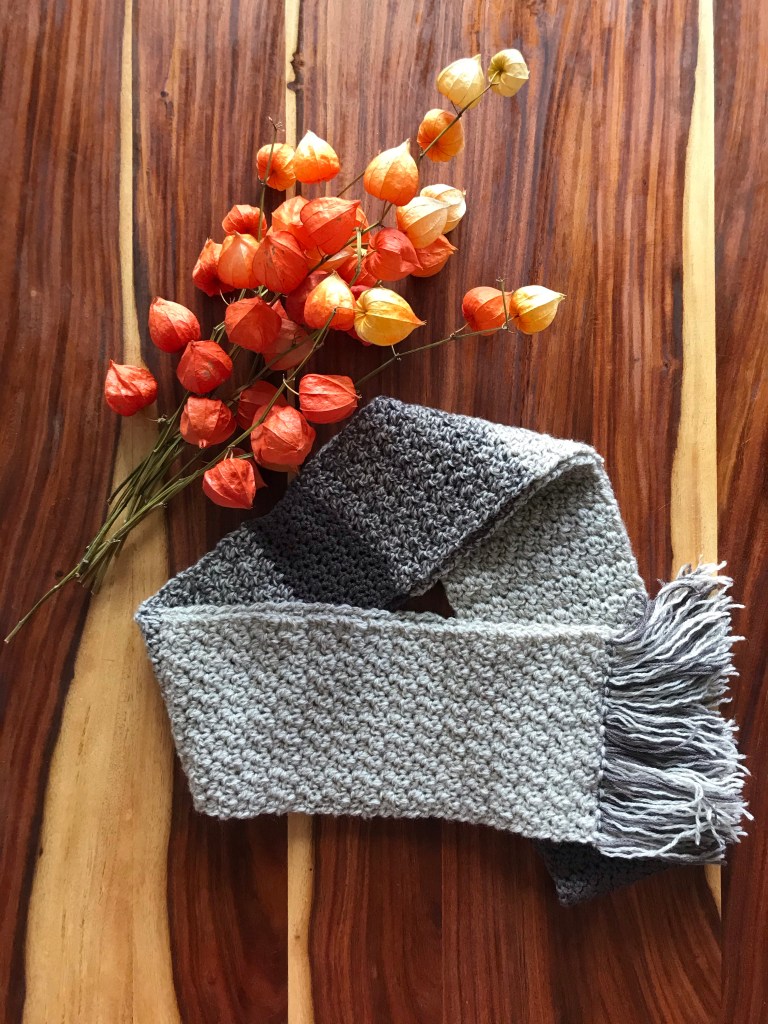
Salutare, oameni frumoși,
In acest video mi-am propus sa va dau o idee de cum putem croșeta un fular foarte, foarte rapid și foarte frumos.
Practic, in câteva ore vom avea un accesoriu frumos și care ne va tine de cald in perioada rece care va veni. 🙂
Tot in acest video veți afla informații utile despre croșeta și despre firele de tip Novelty.
Cum ținem firul in tensiune și pe croșeta pentru un aspect curat si ce este un fir Novelty.
Secvența pentru model este formată din repetiție de doua ochiuri și doua rânduri.
Happy crochet și aveți grija de voi!
Pe curând,
Ditza


You must be logged in to post a comment.